Category: Hunting Blog
Turkey Hunting: Favorite Locator Call #2 | The Crow Call
Last week we shared turkey hunting tips for locating turkeys with an owl call. The owl call is the first call out of our vests when we hit the turkey woods. As we go through the day, other calls start to come out to call in or locate those toms.
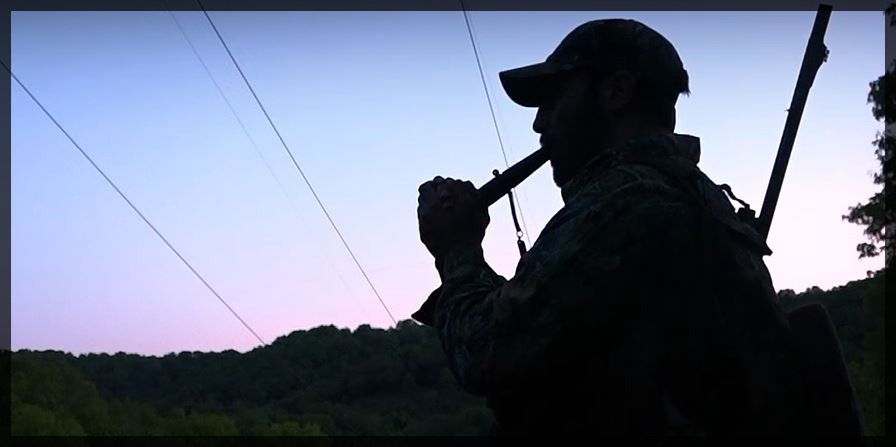
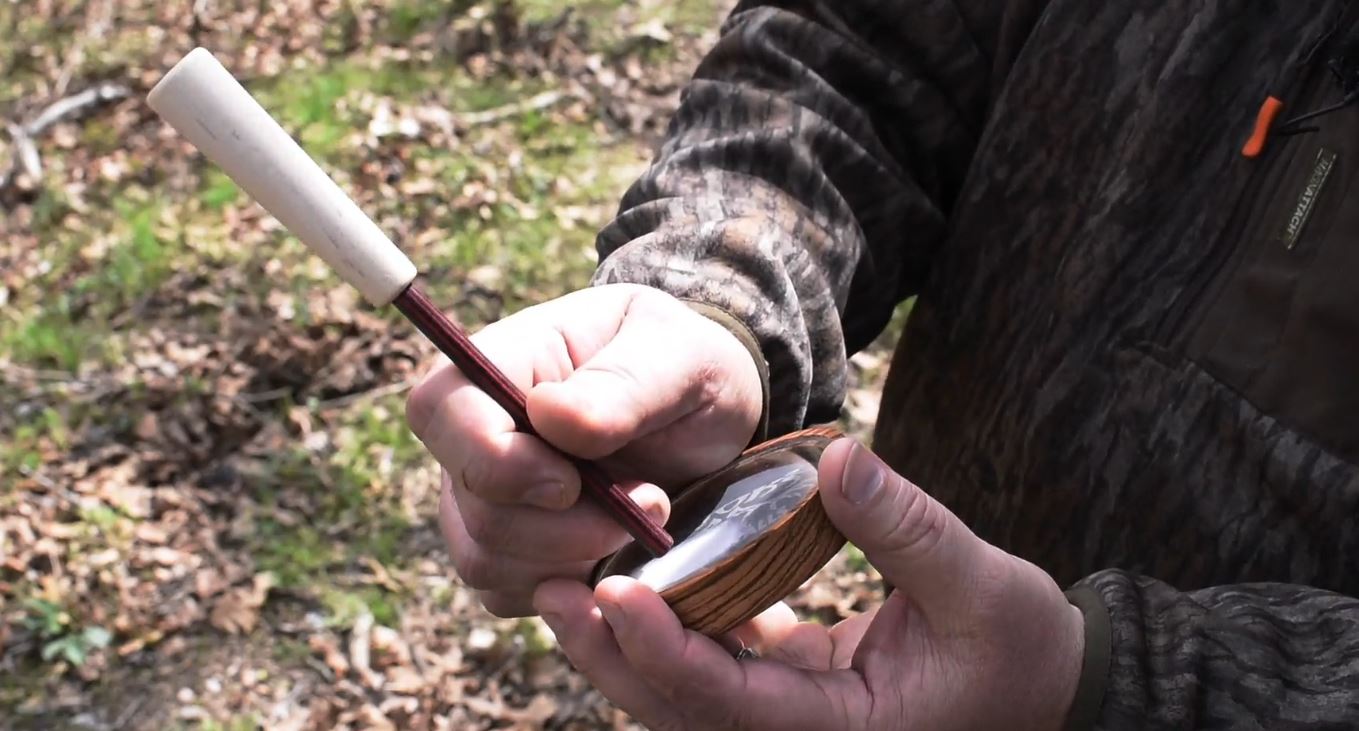
World Champion Caller James Harrison has some advice for those turkey hunts that don’t go quite as planned, when the toms went the other way or just go totally silent. In these type of hunting situations he considers one of the best tools to use to locate more gobblers a crow call.
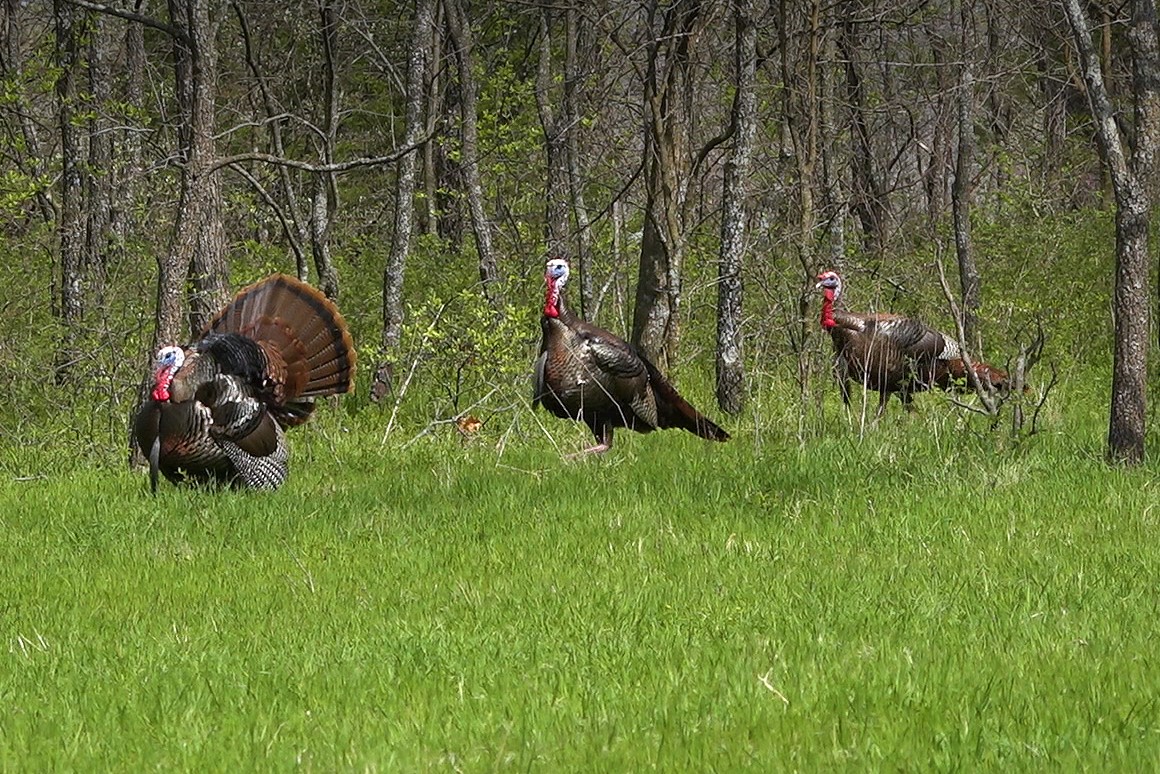
Crow calls are louder, sharper and will get the toms to gobble. It is one of James’ favorite tools to get turkeys gobbling.
In the early morning hours, if you’ve tried an owl call without response from the turkeys, James suggest changing things up. You can even use them right off the roost if you’ve got a lot of owls in your area. If the owls are hooting and the turkeys aren’t gobbling, make a crow call.
He definitely recommends using a crow call from midday on.
For those states that allow all day hunting, they are especially good for the afternoon and early evening before the birds go on the roost.
If you’re hunting with a partner have them step away from you (the caller) so that they can listen for the tom’s response to the call (just like with the owl call) as crow calls are extremely loud.
James recommends crow calls with a sequence of three to four short bursts, varied in length. Listen. Repeat.
If you’re “tuned up” you can get crows to respond back and actually call in crows! When another crow responds back, he’s actually locating the turkeys for you!
The more realistic you can be with your crow call the better off you’re going to be when turkey hunting! Locator calls like the owl call and the crow call can be practiced outside without educating the turkeys in your area as you “learn” the calls. So while you’re sitting on the porch, checking trail cameras, fishing at the pond, shed hunting, or just doing yard work – take your crow call along and get some practice in!
A special thank you to James for these helpful tips! We hope they will bring you success this year on your next turkey hunt!
Enjoy Creation,
Tracy Woods
Turkey Hunting: Using an Owl Call
What’s the first call to come out of your turkey vest?
To locate gobblers early in the morning one of the best calls to use is an owl call. It’s one of the best calls to get turkeys to sound off on the roost. (You'll see Daniel and Clay using an owl call in this turkey hunt linked here.)
After talking with world champion caller James Harrison, I’ve put together a few basic tips for using an owl call. James Harrison is the mastermind and creator of the Harrison Hootin’ Stick by Hook’s Custom Calls.
If you are hunting in hardwoods, it’s important to not call too loudly at first. Owls are naturally only so loud. If a turkey is nearby and you over blow, you’ll scare the tom into not gobbling. It’s best to ease into the call. A modest, softer first “hoot” is best. If all is silent, you can begin to crank up the volume.
If you are hunting with a partner, send them a short distance from you (the caller). That way your partner can listen to see if there is any response to your calls. As the caller, you will have the sound of the call in your ears and may not hear a tom answer.
If you are in open country, try holding the call at the end, grasping it with your thumb and index finger, making an “okay” sign with the end of the call in the middle. Then cup the other fingers to make an open “tube” on the call. This will help you get a little more range out of the call. The pitch is higher and carries a little further to get distant turkeys to gobble.
The more realistic you can make your calls the better off you are. It’s safe to practice owl hooting in the pre-season. Break out the calls, step outside and work on those hoots!
(To see how to use an owl call visit Hook's Custom Calls to see the “how to” videos on their page.)
Enjoy Creation,
Tracy Woods for the GrowingDeer Team
A Hunting Legacy: Glen Woods
These past few months have been very difficult for the Woods family. Last week was the most difficult of all as we said good bye to Grant’s father, Glen Woods. Glen, “Pops”, hunted with the GrowingDeer Team and became a familiar face to viewers of GrowingDeer videos.
Glen loved fishing and hunting. He passed on that love of hunting to Grant. He was a patient father, taking Grant out to hunt as a young boy. When Grant developed an interest in turkey hunting, Glen rose early to take Grant to the turkey woods even though he himself did not hunt turkey at that time. He waited at the truck while his “boy” chased turkeys around the Ozark hills and hollers. Grant was blessed to have his father as his best friend and best hunting buddy. Hunting and fishing kept them together with time to talk in the truck driving to hunts, in the hunting blind or fishing boat. These are memories Grant will treasure.
Many folks have written expressing their condolences which we very much appreciate. One dear friend shared a wonderful note of encouragement with Grant. His insightful words were so comforting that it is an honor to share part of them here:
I can still remember the first time I met your father. We were doing a prescribed burn on your farm (what is now known as The Proving Grounds) and he was in charge of being on the lookout for fire crossing the line. There’s an old saying that I hear a lot, that you can tell a lot about a person by their handshake. This certainly holds true in your father’s case. When I shook his hand, it immediately told me a story about your father that was also verified by so many people at today’s service. His strong grip could have easily crushed my hand even in his 70s-80s. The rough skin told me that he had spent a lot of long days doing manual labor and probably spent very few days behind a desk. This told me immediately that your father was a hard worker and that I had my work cut out for me that day and that I was going to be giving my full 100% just to keep up with him. Hopefully I didn’t let him or you down.
That first time I met Glen his eyes also told me a story. I am sure that at his age there was a lot to be frustrated, grumpy or to complain about, but his eyes always told me that he was happy. I am sure that in his 87 years of living that there were probably a few frowns, but every time I ever saw him, his eyes told me that he was the happiest man on earth. Another thing that I saw was his love and respect for his children, especially you, Grant. I never had the privilege to spend much time around your sisters, but could tell that his family was perfect in his mind. He didn’t have to say much, just the simple words “Thank you, son.” and the way he said them told me that his love for you and your family was endless.
Your father always had a pair of binoculars either around his neck or within arm’s reach. It’s as if he was afraid that at any moment some part of God’s Creation might in fact try and sneak by without him noticing it. I doubt that even the sneakiest bobcat was ever able to get by without your father seeing it, and sure wouldn’t have gotten by if he had decided to take a shot at it! What an amazing shot he was…
Our friend really captured the essence of Glen in his note. He really “saw” Glen. We appreciate his sharing the impressions Glen made: to be remembered well by friends and family is a blessing and an indicator of a life well lived.
Additionally, for those readers that are interested, here is Glen Woods’ obituary.
Glen Woods died peacefully on February 15, 2018, at the age of 87 in Springfield, Missouri.
Glen was born on October 18, 1930, in Springfield, Missouri, to Noah and Ola Elizabeth Woods. He accepted Jesus as his Savior as a young boy and followed Him all his life. In 1949 Glen married Jean Kirk. They were married for 68 years. During his lifetime, he was blessed with three children, four grandchildren and three great-grandchildren.
Glen started learning the construction business at a very early age. At first, he was a plasterer and then started building homes in Springfield and Republic and the surrounding area. He worked on large construction projects in several states. He was an honest and skilled contractor teaching the building trade and life skills to many young men throughout his career.
When not working, Glen loved to go fishing and hunting. His other hobby was raising a garden and sharing his produce. Good tomatoes and cantaloupes and watermelons were his specialties! He and Jean also owned a farm at Republic where they raised sweet corn, green beans and all kinds of vegetables. Somehow, they also found time to raise cattle, hogs, and alfalfa hay.
Life was busy for Glen and Jean as they travelled to many of the fifty states either for fun or so Glen could lead a construction crew building a new mall, hospital or business building.
Services for Glen were held on Monday, February 19 in Springfield, MO.
Thank you for keeping our family and the GrowingDeer Team in your prayers. We appreciate them more than you will ever know.
In closing, we would like to encourage you to spend time with your loved ones, take them out and enjoy His Creation.
Tracy Woods
Turkey Hunting Tips: How to Use a Pot Call
Do you use a pot call? As we gear up for spring turkey hunting, the GrowingDeer Team will have calls in hand (and mouth) to fine tune calling skills.
With the help of World Champion Steve Morgenstern we’ve created several tips on how to effectively use a pot call for turkey hunting:
- Grip: Grip is everything. Grip the pot with your fingertips. Do not let it set flush with the palm. That deadens the sound. Keep your fingers extended with open space under the call. This creates a sound chamber and helps the call carry and sound real.
- Striker position: Rest your hand on the side of the pot. Hold the striker about an inch up from the tip of the peg. Tilt the striker peg slightly so that it will bite the surface of the call. Where you hold the peg determines the sound produced. Play with where you grip/hold the striker. Gripping the striker peg further down will give you a different pitch. Experiment to find the “sweet spot”, which makes the most realistic sound.
- Cluck: A simple, short, quick, straight rub of the striker against the surface. A slight snap often helps.
- Yelp: A Yelp is going to be your basic call. The yelp is a two note sound. You’ve got a high note at the top, a low note coming down. Move the striker in a curving motion (think oval shape, fish hook, or J shape) to get high and low notes. Then develop a rhythm as you put them together.
- Purr: Lightly drag the striker across the surface, allowing it to skip slightly. It’s a softer call so keep it light and slow.
Thanks to Steve for these simple tips! Stay tuned! We’ll be sharing more expert tips to improve your turkey calling over the next few weeks as we gear up for turkey season!
Enjoy creation,
Tracy
Shed Hunting Fools
We get so excited when we find a shed antler here at The Proving Grounds. It’s fun to share the excitement of finding antlers on Facebook and in our weekly episodes. You may be wondering what the secret is to finding all those antlers.
The secret to finding shed antlers is one word: persistence!
When I start to get discouraged I remind myself that it is impossible to find antlers if I am at the office sitting at my desk (or at home cleaning, cooking, watching TV) and not getting out into the woods. At least by getting out for an hour here and there, the odds increase in favor of finding an antler.
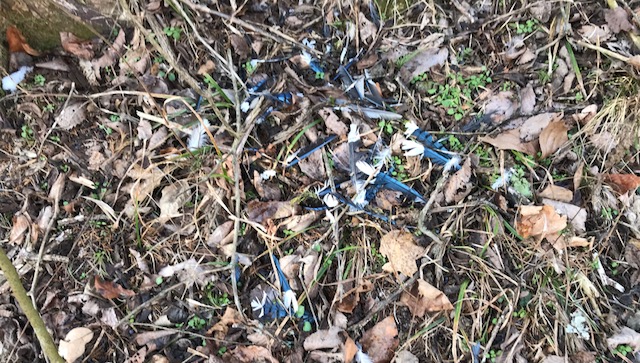
Staying motivated while shed hunting is a mental game. You have to congratulate yourself when you “spy” the unusual in the woods or the food plot: the turkey feather, the blue jay feathers, squirrel skull, etc. Congratulate yourself because your eyes are still working and seeking out the “difference” in the landscape.
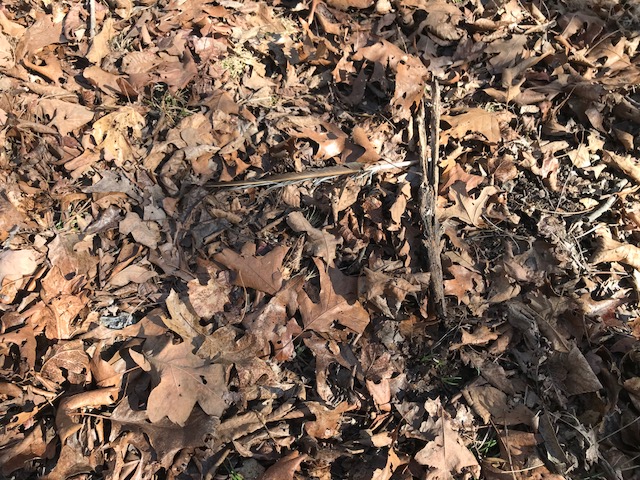
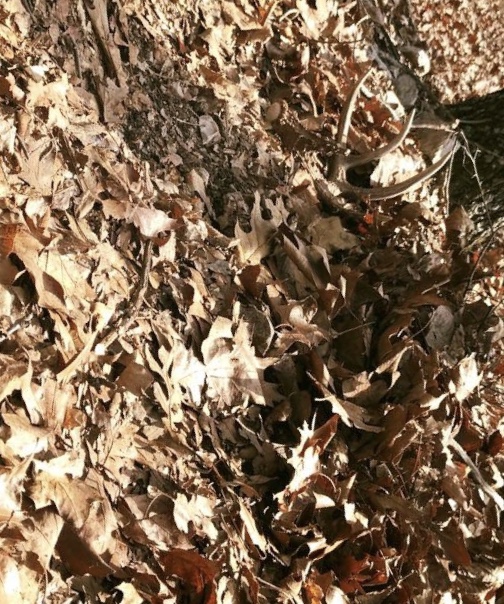
Did you notice this is a feather and not a stick?
Congratulate yourself when you spy the unusual in the landscape.
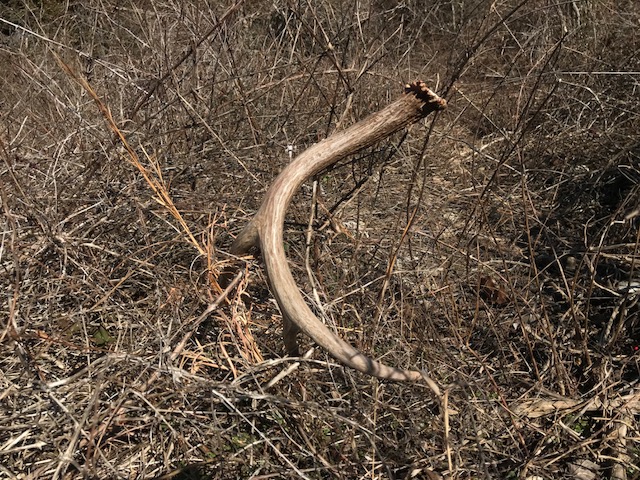
The old bones, weird rocks, or antler shaped sticks are the kind of things I call “shed hunting fools”.
Frequent fool while shed hunting: old bones (look closely – center of image.)
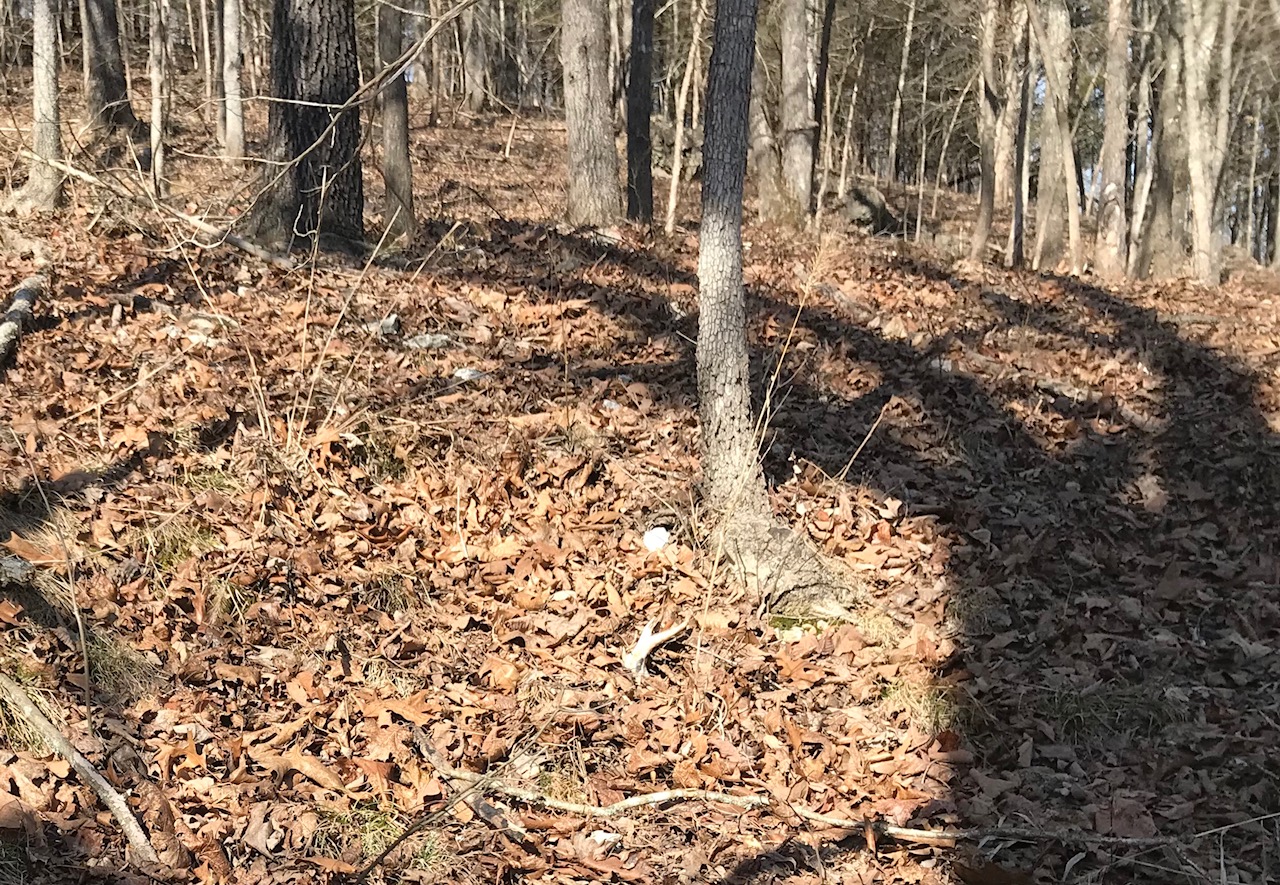
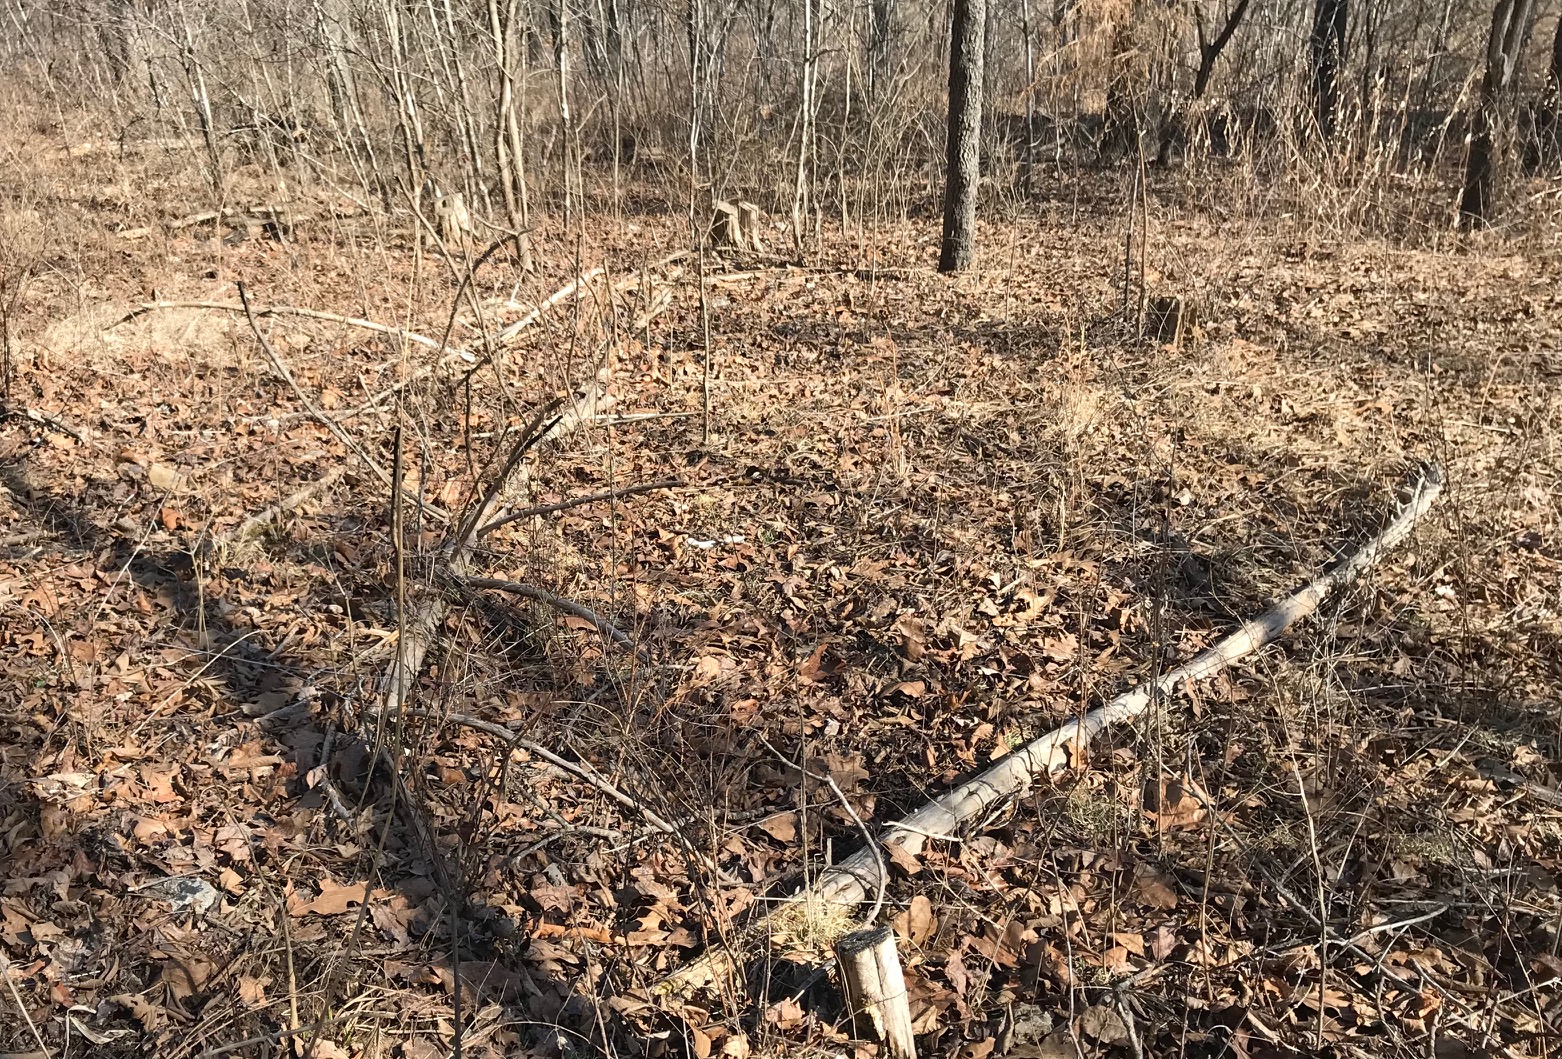
Limbs and sticks in the shape of an antler or an antler tine can fool shed hunters.
From a distance there’s just enough similarity to an antler to make you quicken your step to get a few feet closer to see if it’s really an antler or….not. I turn that disappointment around to serve as motivation to keep going and searching for the real deal.
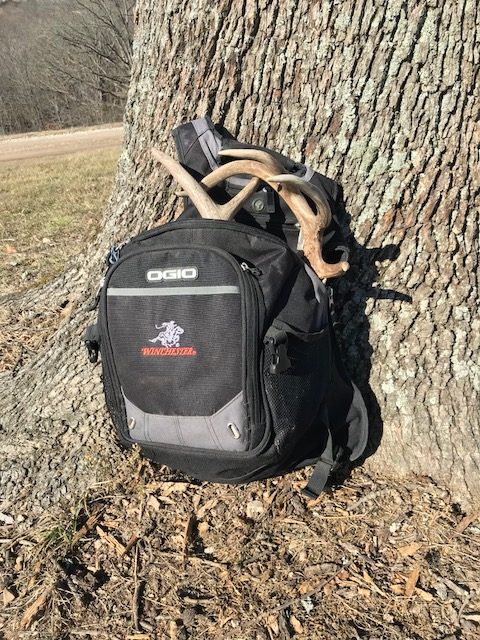
This week I was ending a shed hunt without any antlers in my backpack. It was time to leave the woods so that I had time to get ready for Wednesday night Bible study. Just before I turned to head to the truck, I caught a glimpse of white on the slope just above me. I found not one, but two nice antlers within 4 feet of each other. Now that was a great way to end a hike! The reward for being persistent and staying motivated was at the end of the trail.
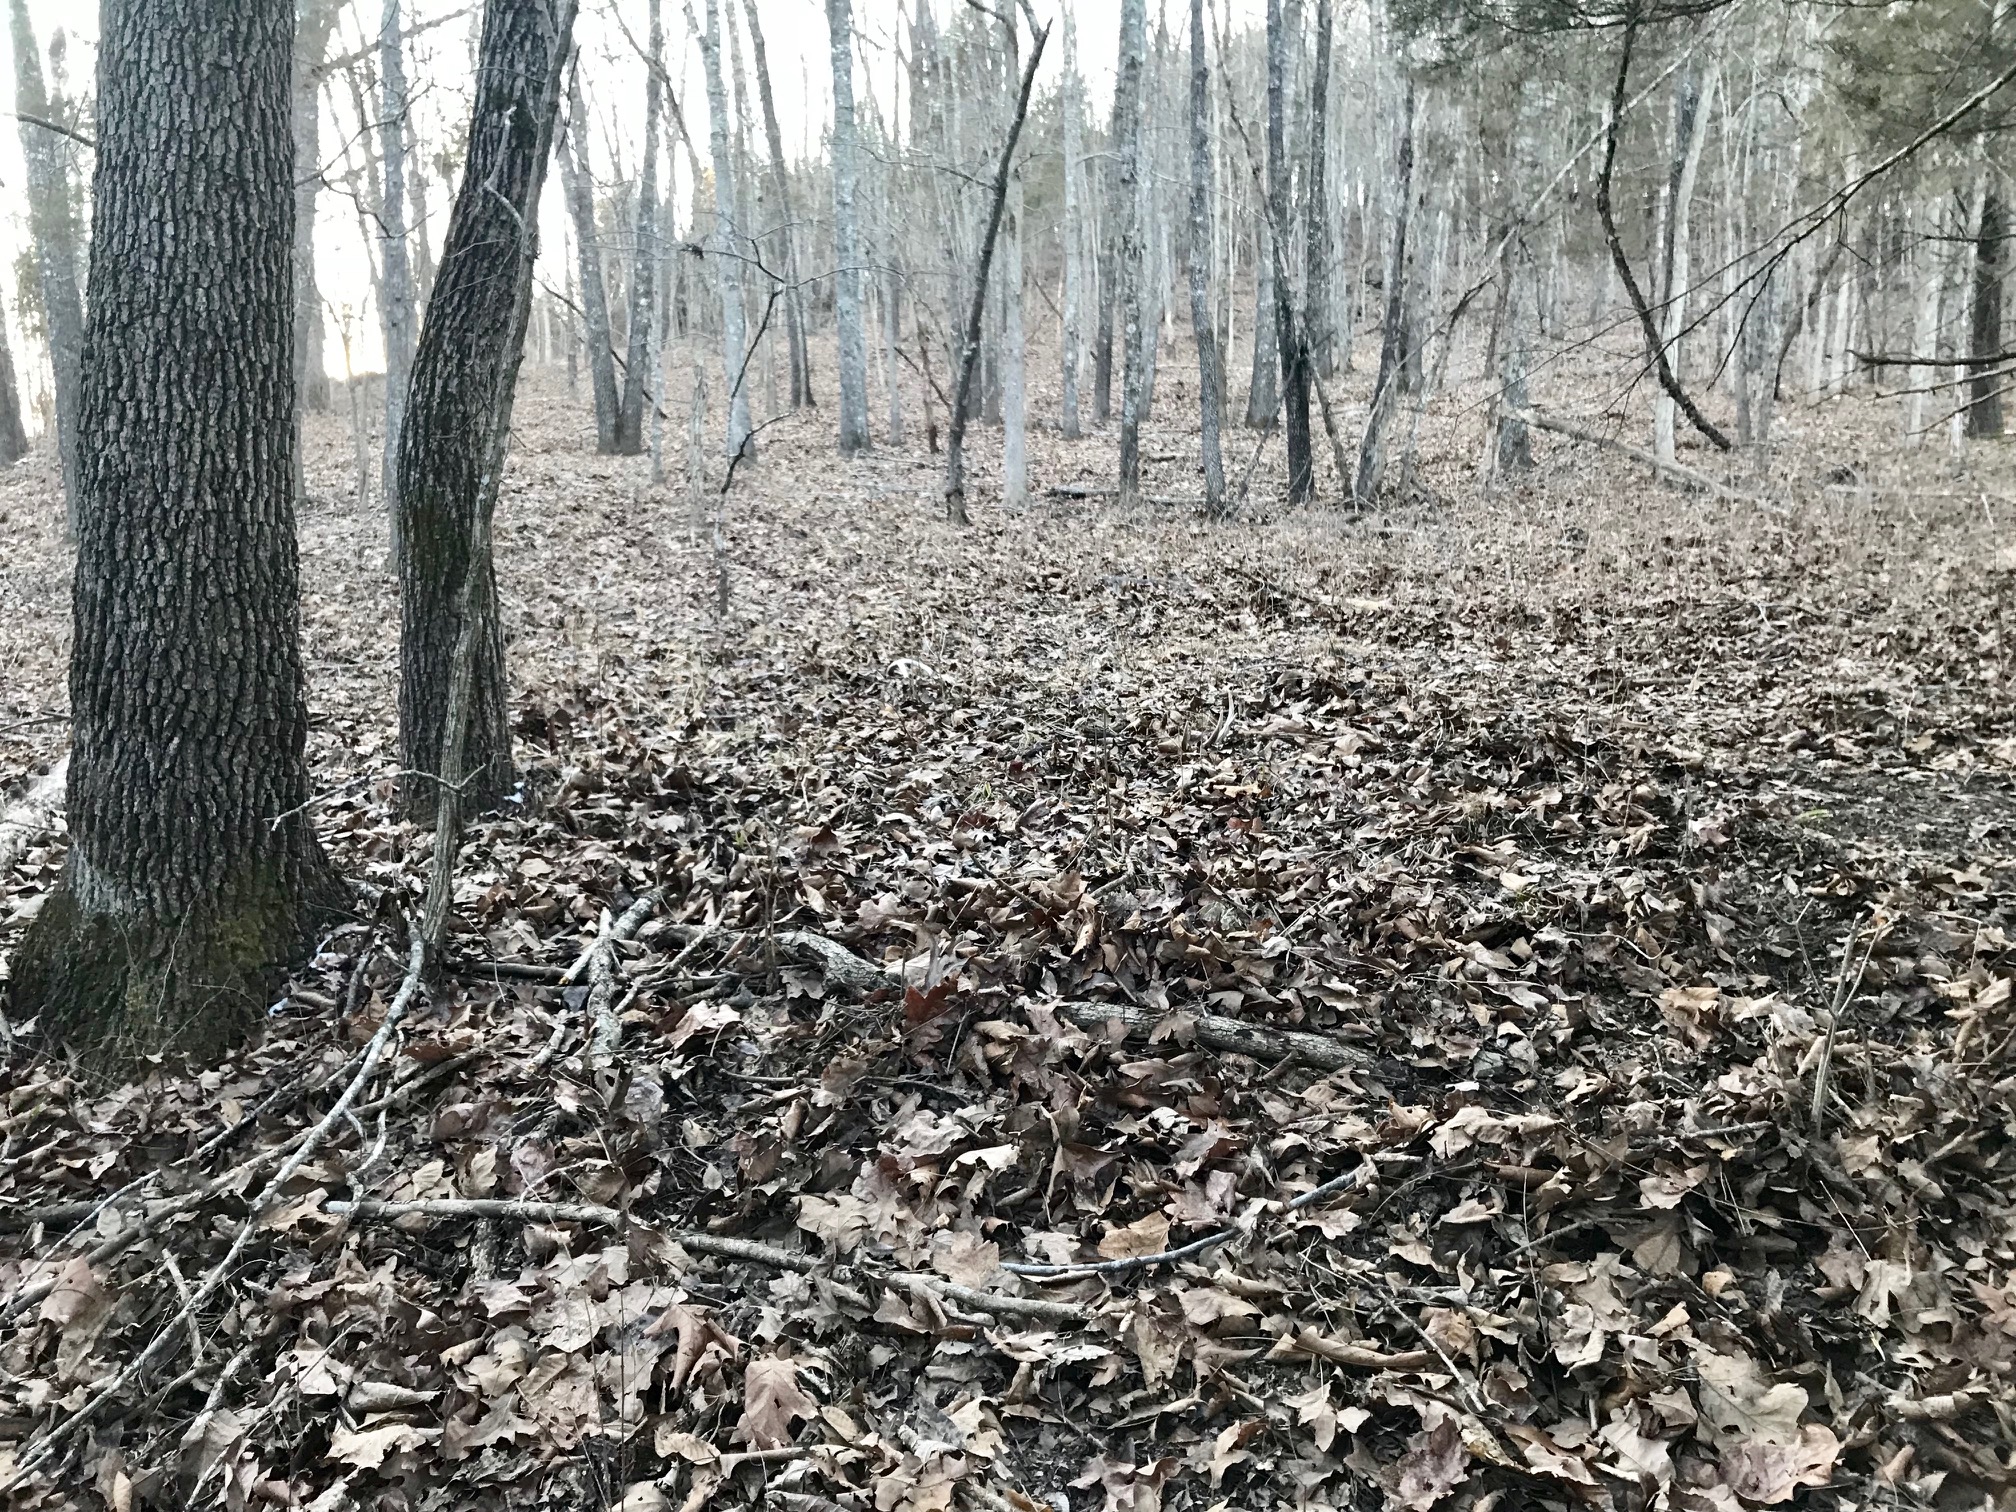
A reward at the end of the trail: 2 antlers! Test yourself. Can you spy them?
Next time you’re shed hunting. Don’t give up. Stay motivated and get back out there!
Hunting shed antlers,
Tracy
Benefits Of Shed Hunting
The GrowingDeer Team is excited to search The Proving Grounds for shed antlers! There are multiple benefits to shed hunting: the enjoyable walk in Creation along with the challenge of finding that prized antler (no matter the size).
This passion for shed antlers isn’t limited to long walks across fields and woods. We are all actively looking for antlers anytime we are out on the land. Whether it is scanning a food plot as we drive by, checking out rub lines and scrapes as we check trail cameras, or blowing fire lines.
While we are busy looking for antlers, we are also scouting and thinking about next season.
Here are a few things to keep in mind while shed hunting.
Hit List Inventory
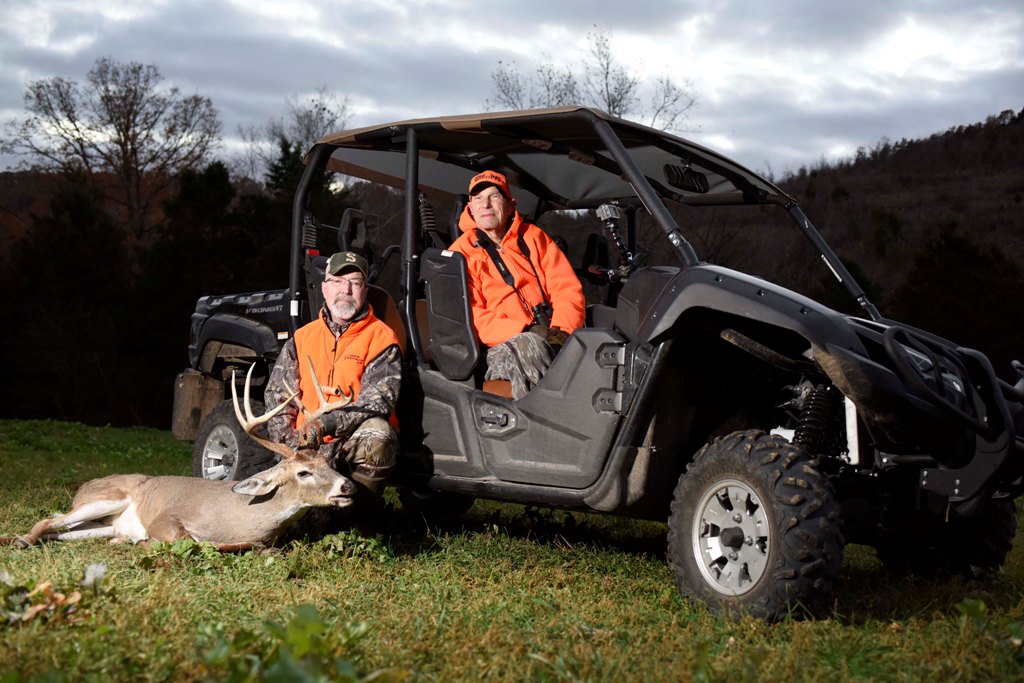
Most hunting seasons are closed when prime shedding occurs. No matter what age structure you set for your buck harvest goals, finding antlers provides information that can help you locate and hunt deer next season.
As bucks age, they can be more reclusive and difficult to pattern and hunt. Finding the shed of a mature buck is great information. It means that buck has survived another hunting season and could show up in front of your stand next fall! Finding a shed antler tells you where that buck travels during the late season. It is simply one more piece of the puzzle for hunting that specific buck.
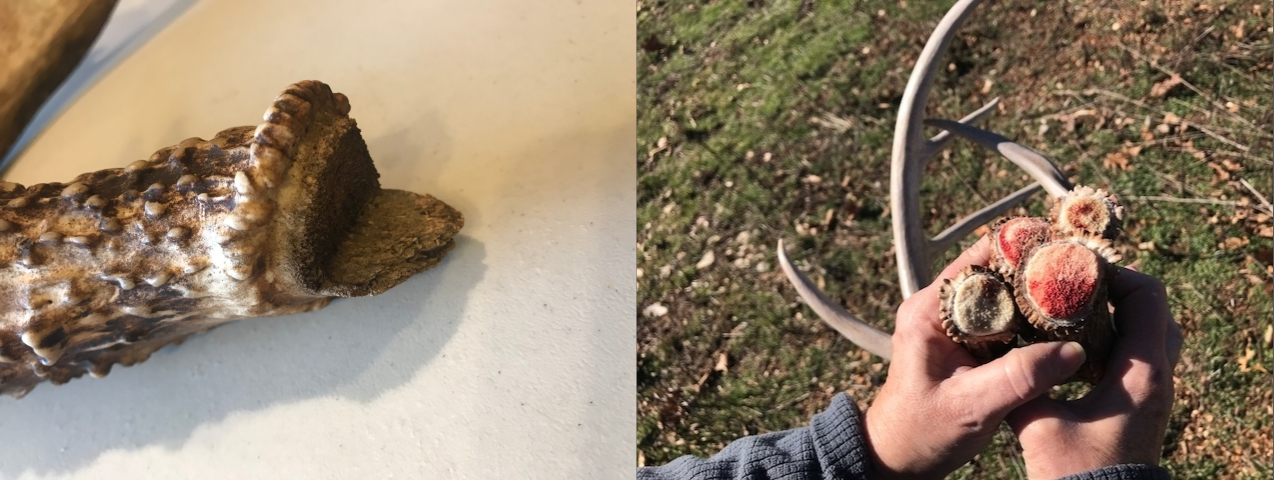
Hunters can gain even more data about the buck by looking at the base of the shed. Clean bases are good. It means that the buck is likely healthy and had a clean casting. However, sheds with jagged pieces on the base may indicate that the buck has a brain abscess or other injury (this is not always the case).
Hunting Information
Shed hunting also gives hunters the chance to get boots on the ground and read fresh deer sign. Oftentimes, shed hunting can take you down unexplored trails and into thick cover. Shed hunters can quickly learn where late season bedding areas and food sources are located. Travel corridors in between these areas are often great hunting locations if the hunter can enter, hunt, and exit without alerting deer.
We all love shed hunting for different reasons, the bonus is shed hunting helps us to become better hunters. I hope you can throw on your boots, grab your family and friends and begin shed hunting soon. I think you will be surprised at how much you can learn while searching for antlers!
Enjoy Creation,
Daniel
How We Hunt Shed Antlers
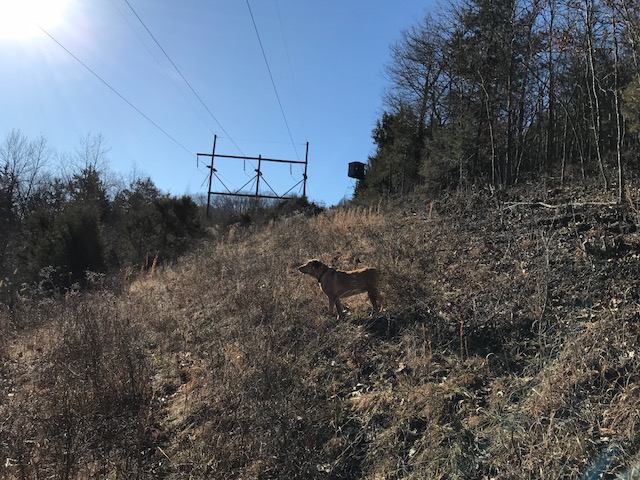
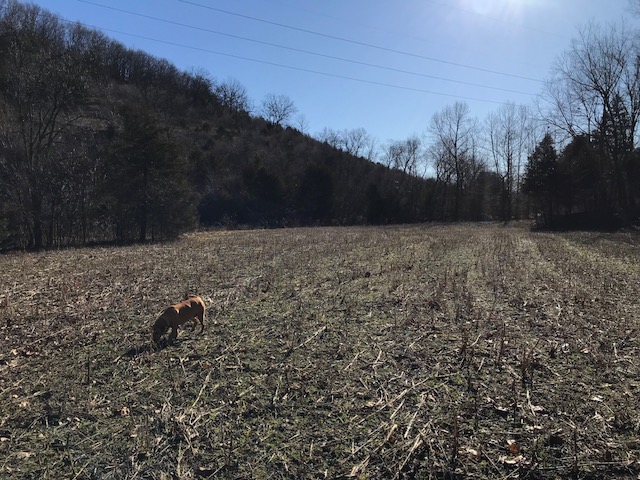
Bucks started shedding their antlers early this year here at The Proving Grounds. We watched bucks that were using the food plots near our house with the iScope and saw that about half the bucks coming into the field had shed. The Reconyx trail cameras showed that there were a lot of bucks that had already shed on a pattern at a food plot we call “North Field.” Given this great information, I was excited to take Crystal (my Labrador Retriever that has been trained to find antlers) over to hunt this area for shed antlers. We had a great Saturday morning shed hunting. We've been out every day this week searching new areas. While we were out I captured the following images to show how we shed hunt.
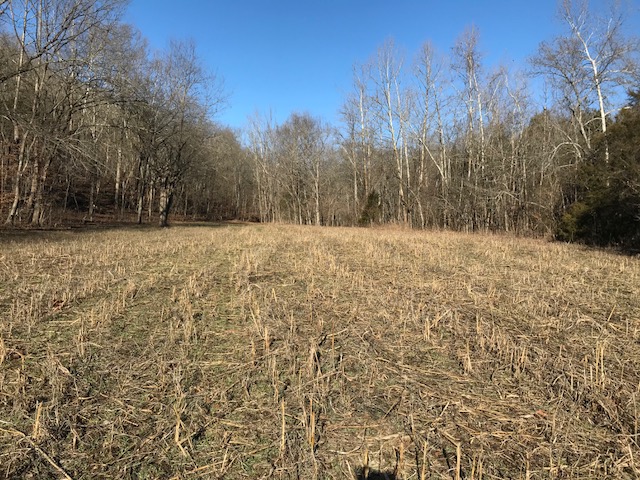
Following a rub line is a great strategy for finding shed antlers. It's assurance that you are searching in an area that the bucks have been using. Take a good look at this photo series. If you look closely you will see multiple rubs in several of the photos.
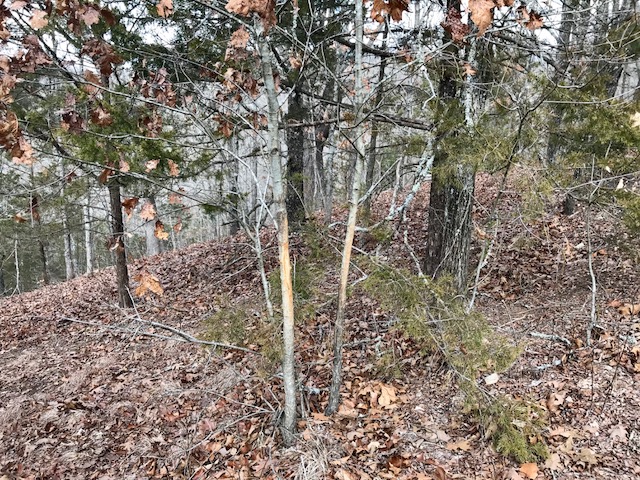
Finding rubs and scrapes are one of the keys to staying motivated while shed hunting. There is always a fresh burst of energy to walk and hunt just a little bit longer when there is such obvious sign that the bucks were/are actively using an area. Following this rub line payed off for us. It eventually led to where the deer had bedded down on a south facing slope. We had just come out of very cold spell, with abnormally low temps and snow. The deer found refuge and warmth on this south facing slope, in the timber, out of the wind and with sun on those clear days.
When I come across sign that deer have been bedded down in an area, I always slow down and spend a little extra time thoroughly checking each bed for antlers.
Even if you don't find a rub line, look for deer trails. Stay focused and stay on the trail. It's better to stay on the trail with obvious deer sign than wander aimlessly in the woods “hoping” to come across better sign.
I had success walking through a thicket of briers and honeysuckle this week. The deer trails were obvious so it made sense to check it out.
When you're walking an area, walk slowly (it's not a race, it's a hunt!) and frequently turn around and look behind. Get a different perspective on the ground you've already covered. The change in perspective might make that antler “appear” out of the leaves, grass, or brush. Why? Because the angle the antler is turned (tines down, tines up, buried and the base only showing, or just a tip of a tine) might catch the light or be more obvious. Additionally, those pesky squirrels might have found the antler and left it at the base of the tree out of your line of sight if you are only looking forward.
Perspective, or angle, and light are important aspects of shed hunting. Especially if you are searching in hilly country (like I am). I prefer to shed hunt walking uphill. I know that sounds crazy. Walking uphill forces you to be just a little slower. The upward slope also makes the antlers stand out more.
That said, it's also important to turn and look downhill to get that different perspective on the antler that was camouflaged or buried in the brush.
I prefer to shed hunt on overcast days. Bright, sunny days will either wash out the contrast or throw so many shadows that differentiating corn stalks, sticks, chewed up turnips, rocks, etc. from an antler almost impossible.
The above photo shows how the light can make shed hunting harder. We were walking towards the sun. At times like this, improve the odds of finding an antler by turning around and walk with the sun at your back.
See the difference?
When I shed hunt I carry a backpack. Usually there are two or three bottles of water, snacks, dog treats, and lots of empty space. The empty space is there to put my jacket as the day warms up and, most importantly – for all the antlers we find!
We'll be shed hunting as much as possible over the next few weeks. I'll share more about what we're doing and where we're finding sheds again soon!
Hunting shed antlers,
Tracy Woods
Trapping At The Proving Grounds
When I was a young boy in the 1970s raccoon hides sold for $40+ in my neighborhood and gas was $0.70 per gallon. Now raccoons bring less than $10 in the same area and gas is over $2.00 per gallon. We all know the price of fuel, steel, etc., has increased dramatically. There is very little incentive for trappers, except for the love of the work, to remove predators. Predator species have few predators in most areas.
The benefits of trapping include removing predators and learning a lot about all critters. If you can get good enough to make a predator stick its hand in a little two inch circle, you can figure out how to pattern deer. So, trapping makes for a better deer hunter. In addition, it makes hunting better by allowing more prey species to flourish. It’s just a great all around scenario.
“Balance” is a tough objective to achieve in most aspects of wildlife management. This is because the habitat and populations are always changing. It is a fantasy that wildlife populations or habitat will remain balanced without man’s intervention. Allowing either predator or prey species to build up too high always results in bad results. This has been documented time and time again in species like deer, rabbits, wolves, etc.
However, given that the habitat resources are becoming more and more limited, big swings in population levels don’t recover as easily. I don’t wish for predators – bobcats, opossums, fox, raccoons and coyotes – to remove most of the prey species – turkey poults and whitetail fawns – at my farm. I want there to be enough turkey and deer for me and the predators. There aren’t many predators of bobcats and coyotes where I live. There certainly aren’t many trappers in my neighborhood. My efforts to trap some predators will certainly not hurt the coyote or bobcat population in the county.
On this property, we work to maintain a reasonable balance between predators and prey. The balance means there are plenty of prey (turkey and venison) for us and the predators to eat. Having just enough prey for only the predators to eat and me shifting to playing ping pong is not an option. I’m going to work to provide good quality habitat which benefits both the predators and prey species, and trap and call to make sure the predators have a predator. Are you managing all the species on your property, or just the prey?
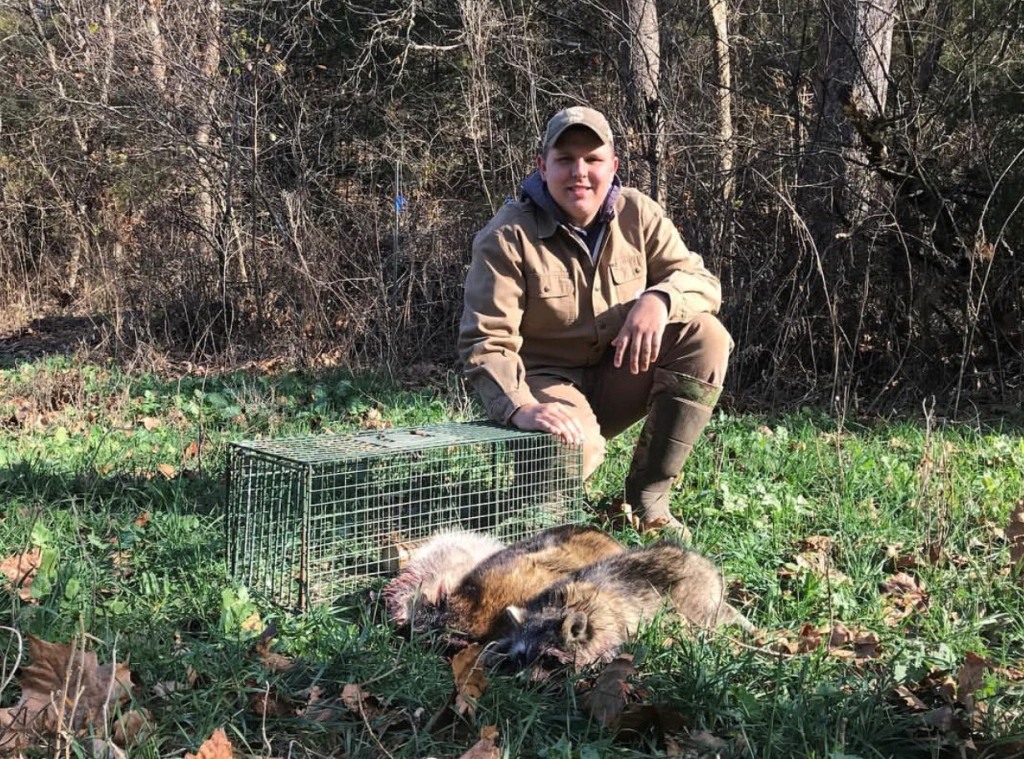
We’ve removed a lot of predators but more move in. If you create a void, remove a bunch of predators, don’t think that you can stop and not trap the next year. I’ve been removing about 50 predators every year: bobcats, coyotes, coons, opossums, skunks and foxes. Our turkey population has absolutely exploded and we’re seeing some quail now. We’ve seen a big response in our game.
Trappers are not motivated to trap for money because they’re only getting one to two dollars per coyote. If you're really trying to increase the number of deer or turkey on your land, hire a trapper or do what I do and learn how to trap yourself. I’ve hired professional trappers but also supplement by using box traps and the Duke dog-proof traps. Currently our intern, Tyler, is effectively removing predators. Coons and opossums are easy while coyotes and bobcats are a little tougher. We’ll keep you updated on our progress over the coming months.
Enjoy Creation,
Grant
Why White-tailed Bucks Shed Their Antlers

Do the bucks in your area have still have their antlers? We’ve got a few bucks that have already started shedding their antlers here at The Proving Grounds!
Antlers are shed as a response to chemical changes within a buck's body. These changes are generally stimulated by changes in the amount of time the sun shines daily.
However, within this window, several factors such as available nutrition, general health, and dominance ranking can determine when an individual buck sheds his antlers. For example, deer researchers often mention observing two dominate bucks in captivity fighting during this time of year. The loser will shed his antlers soon (sometimes the next day). It seems hard to imagine that antlers will simply fall off one day due to a change in dominance status (along with hormone levels) but these examples seem to indicate that’s the case. Never underestimate the effects of hormones on all critters!
Antlers for most bucks tend to be shed during the late winter months. However, some bucks will shed earlier due to other factors.
Those “other factors” explain my expectation for bucks to shed earlier than normal this year. Why? Because bucks will shed early when they are stressed. We’ve had ongoing drought conditions so our food plots and the native deer browse have suffered.
To a deer manager, forage plants are simply nutrient transfer agents. They simply transfer nutrients from the soil and air to the consumer (deer). No matter how many nutrients are available, plants can’t transfer nutrients without water. Soil moisture was so limited this year that the plants simply couldn’t transfer many nutrients. The drought directly and indirectly caused a huge amount of stress to bucks in my area this year.
Tracy took Crystal, our Labrador shed hunting dog, to one of our larger food plots this week to see if they could find any of those early sheds. In less than 2 hours they found four fresh shed antlers from some of our younger bucks. In addition, we’ve seen at least two mature bucks that have already lost their antlers. It seems my buck hunting may be over soon even though the legal season where I live extends to January 15th.
As you’re finding shed antlers this year, please share them with us on our Facebook page!
Enjoy Creation,
Grant
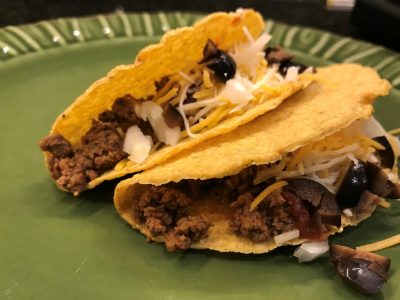
Venison and Wild Game Recipes For the Family: Cooking Ground Venison for an Easy Taco Supper
At GrowingDeer we enjoy hunting. We also enjoy eating fresh venison! Over the years, we’ve shared many of our recipes. In order to make finding these recipes easier for visitors to the GrowingDeer website, we now have them assembled in one “spot”. In the main menu at the top of the website, you will see the recipes tab.
The next time you are looking for an idea for venison, wild turkey, or wild pig – look through the recipes on that page! We have a search feature on our website if you are looking for something specific. Also, Google does a great job showing search results for our website. For instance, a google search for the terms “growingdeer.tv recipes venison” yields these results.
Today we have a new venison recipe to share. Last night, I made tacos for the family using ground venison. Here’s how to make the venison for taco meat:
Ingredients:
1 tablespoon oil (Crisco, vegetable oil, canola or olive oil)
2 lbs. ground venison
1 medium onion, finely chopped
1 8 oz. can tomato sauce
1 package taco seasoning or make your own
Juice of one lemon (approx. 3 – 4 tablespoons)
12 taco shells or corn tortillas
Toppings:
Shredded cheddar cheese
Shredded lettuce
1 – 2 tomatoes, chopped
Chopped onion
Chopped black olives
Salsa
Sour cream
Optional: Spice it up by adding 1 to 2 tablespoons chipotles in adobo OR (not both!) a jalapeño pepper (seeds and membrane removed then finely chopped) when the venison is browning.
Note: I often add up to ¼ cup of salsa to the venison while the meat is browning. This gives it a little extra texture and a little extra flavor.
Directions:
If using hard taco shells, heat oven to temperature as directed on package for taco shells.
In medium skillet, add oil and brown ground venison and onion over medium heat for 8 to 10 minutes or until venison is thoroughly cooked, stirring frequently.
Stir in tomato sauce, taco seasoning and lemon juice. Reduce heat to low; cover and simmer 10 minutes.
Prepare taco shells as instructed on package.
Assemble tacos by layering venison mixture, cheese, lettuce and tomatoes in each taco shell. Serve with salsa; top with onions, olives and sour cream.
Suggestions for side dishes: Salad, refried beans or Mexican rice.
Taco meat can be used for traditional tacos, as a burrito filling, or a salad topper.
For another interesting variation on traditional burritos using venison, see this recipe for Italian-style venison burritos.
Enjoy,
Tracy